Headlight Restoration
Daylight savings time has arrived, and with it, shorter days that force drivers to be out on the road after dark. A rise in car accident rates always accompanies the shift in time, and this problem is only exacerbated by cloudy headlights that make it nearly impossible for drivers to see the road. If your headlights are currently obscured by a foggy film, it is of utmost importance that you get them clean as soon as possible. Every time you get behind the wheel of a car with cloudy headlights, you are putting passengers, fellow drivers and yourself at risk. Restoring headlights is surprisingly easy and cost-effective; by following the steps outlined below, you can return your yellow, foggy lights to their original pristine appearance.
Polycarbonate Headlights Versus Glass Headlights
The restoration tips highlighted below apply only to headlights constructed from polycarbonate plastic. This scratch-resistant material is used for the vast majority of headlights. However, some classic cars have glass headlights. Drivers with classic cars often prefer to have their headlights defogged during professional detailing sessions, but a combination of sandpaper and a glass polishing kit makes for a viable alternative. Glass headlights tend to be easier to scratch, so it is important to take great care while completing the restoration process — and to use glass polish when finished.
Choosing a Kit
If you opt for a DIY approach to restoration, you will first need to choose from a wide array of kits available at online, at automotive shops, and in big box stores. When choosing a kit, keep the potential for future restoration in mind. Many kits are only good for one cleaning, but some offer sufficient materials for multiple uses. With some kits, the potential for future defogging is greatly reduced, thanks to the inclusion of clear coats that protect the lens from fogging. A few drivers swear by simple toothpaste as the ultimate headlight defogging tool, but many prefer the convenience and added protection of headlight restoration kits.
Protect Vehicle Paint
Prior to using a restoration kit, is important to take steps to protect your vehicle’s paint. Otherwise, it is easy to damage paint with the abrasive compound or sandpaper included in the kit. Begin by covering the area surrounding the headlights with electrical tape. Newspaper may be required for additional coverage. Some drivers prefer to remove headlights for cleaning purposes, but this necessitates later aligning.
Clarifying Compound Application and Sanding

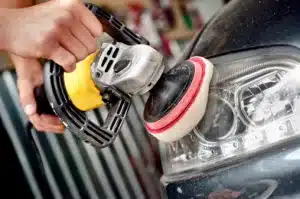
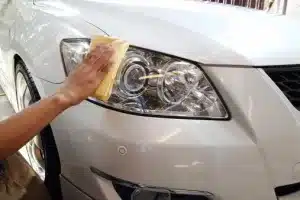
Many restoration kits include clarifying compounds designed to go above and beyond what mere sandpaper can accomplish. This clarifying compound should be carefully applied to each lens. Kits with clarifying compound typically include restoration pads, which can be used to clear up problem spots with severe oxidation. Other kits feature traditional sandpaper, which is used to remove any yellowing that has accumulated. Scratches may occur while sanding; these can be removed with polish, which gives the polycarbonate a clean, clear appearance.
UV Sealant
The best restoration kits include UV sealant, which is necessary after sandpaper or restoration pads have stripped away previously applied UV protection. Without UV sealant, it could be only a matter of weeks before fogging returns.
Headlight restoration is a surprisingly simple process that can improve your vehicle’s appearance and make the roads a much safer place to be after the sun goes down. If, however, you lack the time or ability to restore your vehicle’s headlights, it may be worth your while to seek restoration services from a professional.


